Darkwana Games
  • Home
  • Instructions
    • Read Me First!
    • Player's Aid
    • Getting Started
    • Character Board Anatomy
    • Card Anatomy
    • Card Types
    • Taking Your Turn
    • Common Effects
    • Advance Rules
    • Terminology
    • Other Modes of Play
  • Character Boards & Cards
    • Adiba
    • Boudicca
    • Callisto
    • Europa
    • Hyde
    • Rebecca
    • Seth
    • Tenko
  • Novels
    • Daughters of Darkwana
  • More
    • Home
    • Instructions
      • Read Me First!
      • Player's Aid
      • Getting Started
      • Character Board Anatomy
      • Card Anatomy
      • Card Types
      • Taking Your Turn
      • Common Effects
      • Advance Rules
      • Terminology
      • Other Modes of Play
    • Character Boards & Cards
      • Adiba
      • Boudicca
      • Callisto
      • Europa
      • Hyde
      • Rebecca
      • Seth
      • Tenko
    • Novels
      • Daughters of Darkwana
Darkwana Games
  • Home
  • Instructions
    • Read Me First!
    • Player's Aid
    • Getting Started
    • Character Board Anatomy
    • Card Anatomy
    • Card Types
    • Taking Your Turn
    • Common Effects
    • Advance Rules
    • Terminology
    • Other Modes of Play
  • Character Boards & Cards
    • Adiba
    • Boudicca
    • Callisto
    • Europa
    • Hyde
    • Rebecca
    • Seth
    • Tenko
  • Novels
    • Daughters of Darkwana

Duelists of Darkwana: Tenko's character board

Have too many friends? Play as Tenko and watch them bang their heads against any available surface: table, wall, police car, concerned citizen, beached whale. Whatever's around.
Tenko's all about control and stealing her opponent's cards.

Remember that when a card goes to a discard pile, it always goes to its own, even if another player stole it.


Place Items on the Field?

Tenko Deactivates them.


Supports?

She steals them.


Hey, at least you have your deck to keep you warm at night, right?

Nope.

Tenko's ability, which triggers when she deals 3 points of damage (at once) to an opponent's hit points, she may draw the top card from that opponent's deck and add it to her hand.

This works even during another player's turn, should Tenko find a way to deal 3 points of damage, or more, outside her own turn.


Her opponents can try emptying their decks as quickly as possible, but Tenko has a few cards that will allow her to steal cards from their hands, as well.

The Kiko Clan considers its members "less than an object" until they've killed at least 1 family member in combat.

By age 10, Tenko fought and killed every. Single. Member of her family.

Afterwards, she applied to the Inari Clan.


When kitsunes grow stronger, they evolve new fox tails, which grants them higher-ranking versions of whichever skills they've nurtured.

The max number of tails a kitsune can grow is 9, which very few reach.

. . . Tenko found a way around this.

She learned a skill allowing her to eat another kitsune's throat and consequently grow a micro tail (which doesn't count towards her nine-tailed limit).

The micro tail offers her 10% of the eaten fox's power.


Tenko possesses a puzzle box.

While she's in combat, the box rotates its sides, searching for the right combination capable of hacking into that opponent's mind, before trapping them in their worst memory or fear.


Tenko can siphon away her opponent's magic (fox fire) and stamina through touch.


She can summon mechanical versions of herself (puppets) to fight her enemies while she teleports a safe distance away (did I mention she teleports?).

She can siphon her opponents even when her puppets touch them.


Like all multi-tailed kitsunes, she can discharge from her hands beams of raw, magical energy called Fox Fire Blasts.


To further increase her capabilities, a necromancer named Doth gifted her with two powerful scorpion tails.

Get started with the first novel in the series: Daughters of Darkwana!

Click the link below.

Daughters of Darkwana

How Support Cards Work

Play a Support from your hand at the cost of 1 action.


When you do, place the card face-up on your side of the field, above your character board.

This puts the card both "in play" and "under your control."


Next, place a number of Stamina tokens on that Support equal to the number of points

you have in Influence at that exact moment.


While on your side of the field, Supports offer continuous effects to aid you.


Unless the Support says otherwise, you do not need to spend an action to activate the effect(s) of a Support already in play (you spend an action to put it from your hand onto the field, but, once it's there, it's typically free to activate).


At the start of your turn(s), remove 1 Stamina from every Support you control.


The instant a Support has no Stamina, destroy it (sending it to its discard pile).


Like Items, Supports have an orange trigger box above their text box, telling you when and how often its effects are triggered or can be activated.

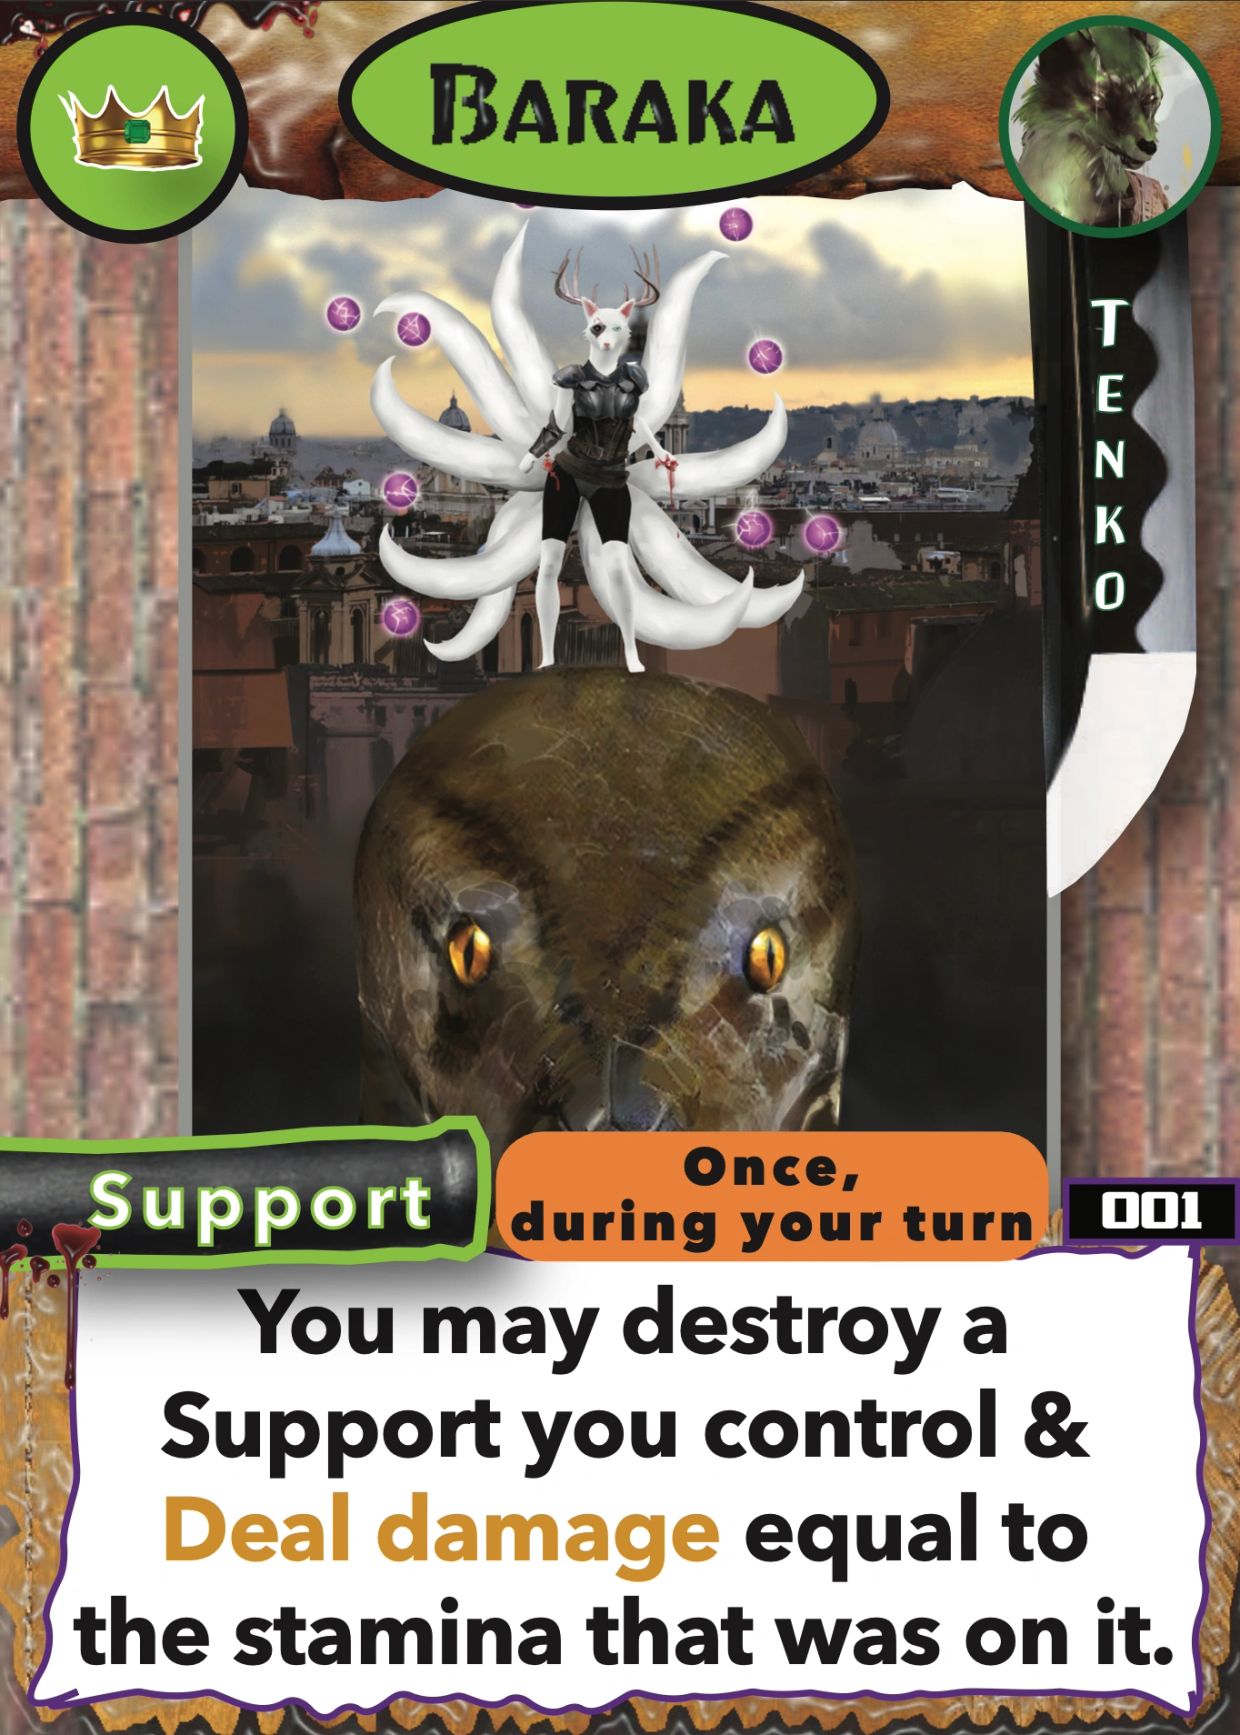
Card Number 001: Baraka

While Baraka is on your side of the field, you may, at any point during your turn, any number of times, sacrifice a Support you control (on the field).


Afterwards, target an opponent, lowering their hit points by the number of Stamina (green) tokens that were on the sacrificed Support.


This pairs well with Tsuchigumo, another one of Tenko's Supports, which allows her to steal an opponent's Support, moving it to Tenko's side of the field and placing it under her control.
If both Tsuchigumo and the stolen Support have 5 Stamina, Tenko could use Baraka to immediately sacrifice the stolen Support, and then sacrifice Tsuchigumo, resulting in 10 points of damage.


Given its high ceiling, Baraka serves as Tenko's nuke.

It takes a lot of set-up to really make Baraka pop off, but it can take Tenko from a losing position to a win the same turn it comes down.

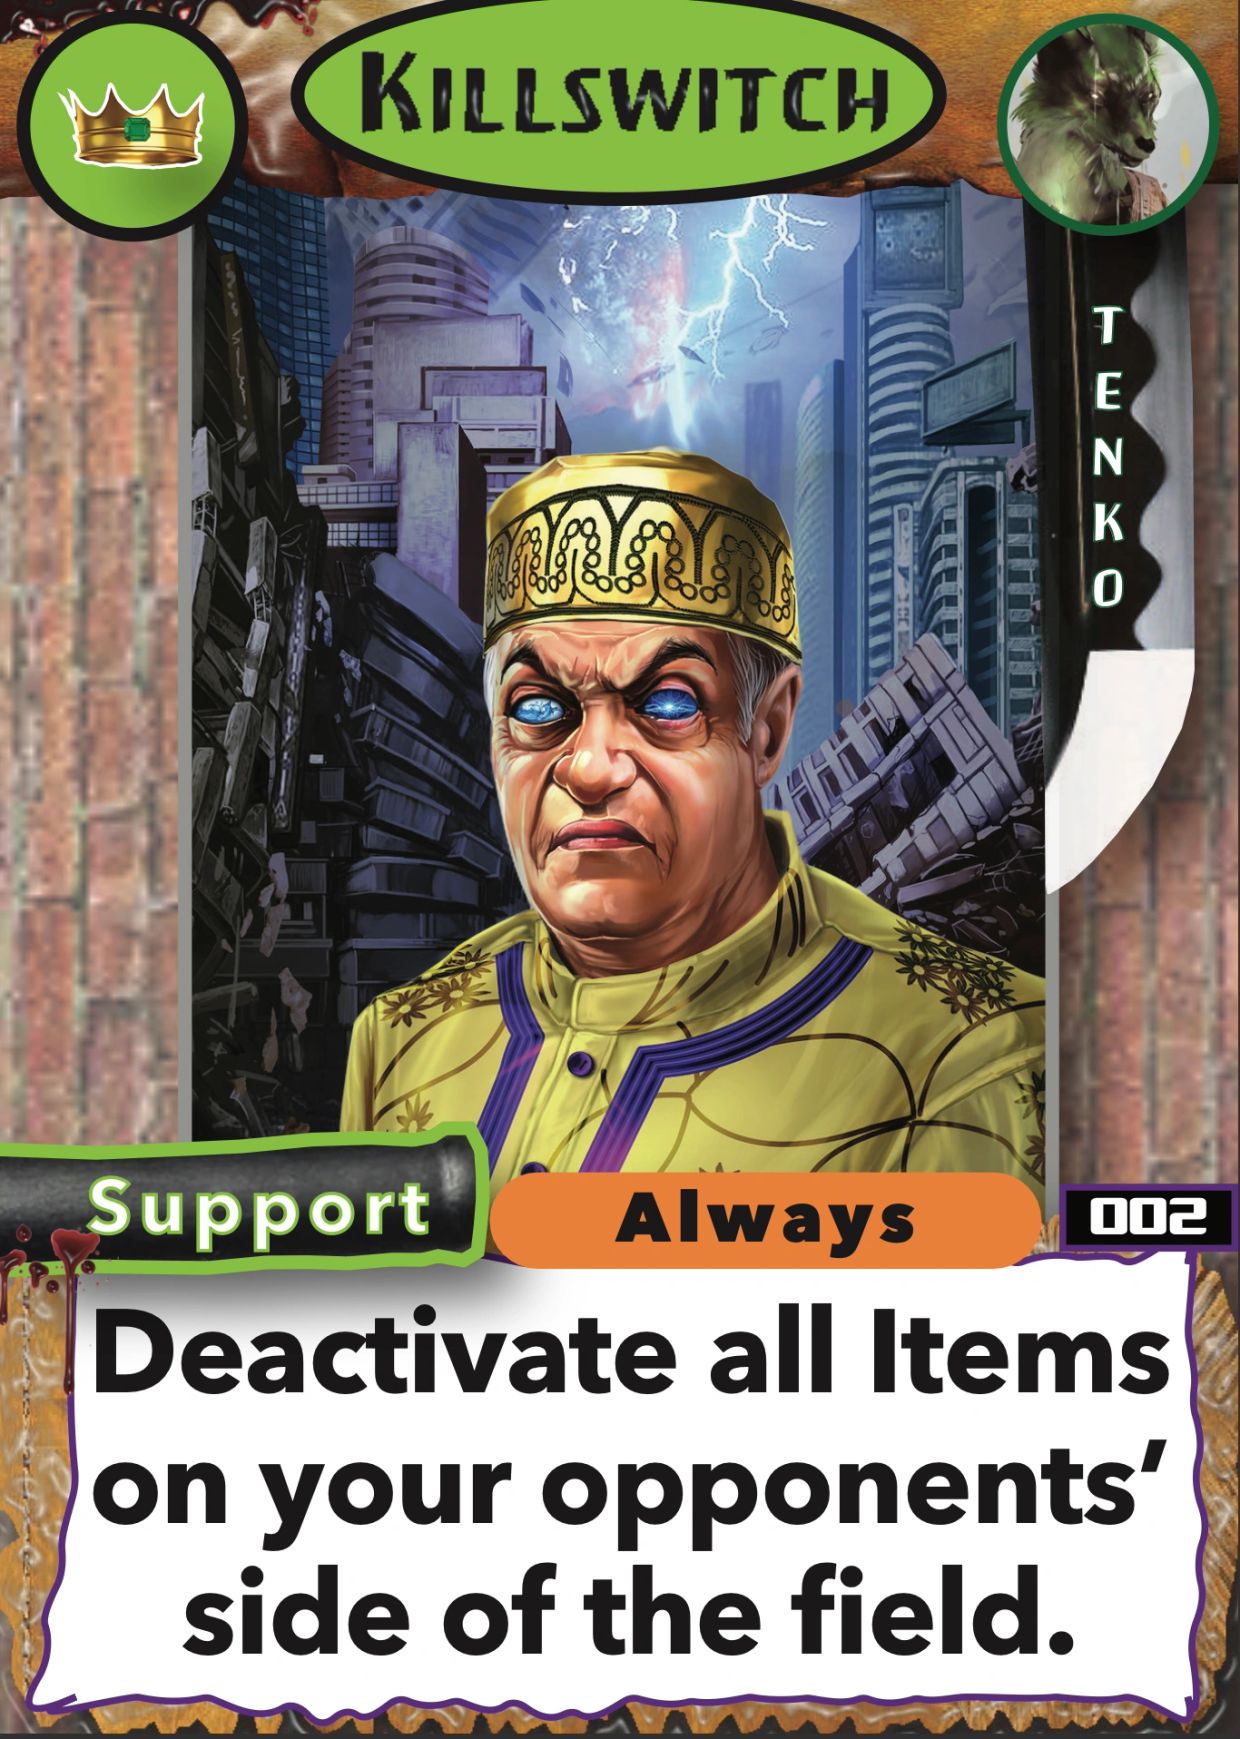
Card Number 002: Killswitch

While Killswitch is on your side of the field, all your opponents' Items are deactivated.

They stay on the field, but their effects are basically removed for as long as Killswitch remains on your side of the field.


No, "opponents'" isn't typo.

There are game modes where you can have multiple opponents.


While Tenko's deck lack traditional Item removal, she instead wields this Support, which does a lot more, but only for a little while (the little-ness of that while depends on how long Killswitch stays in play.
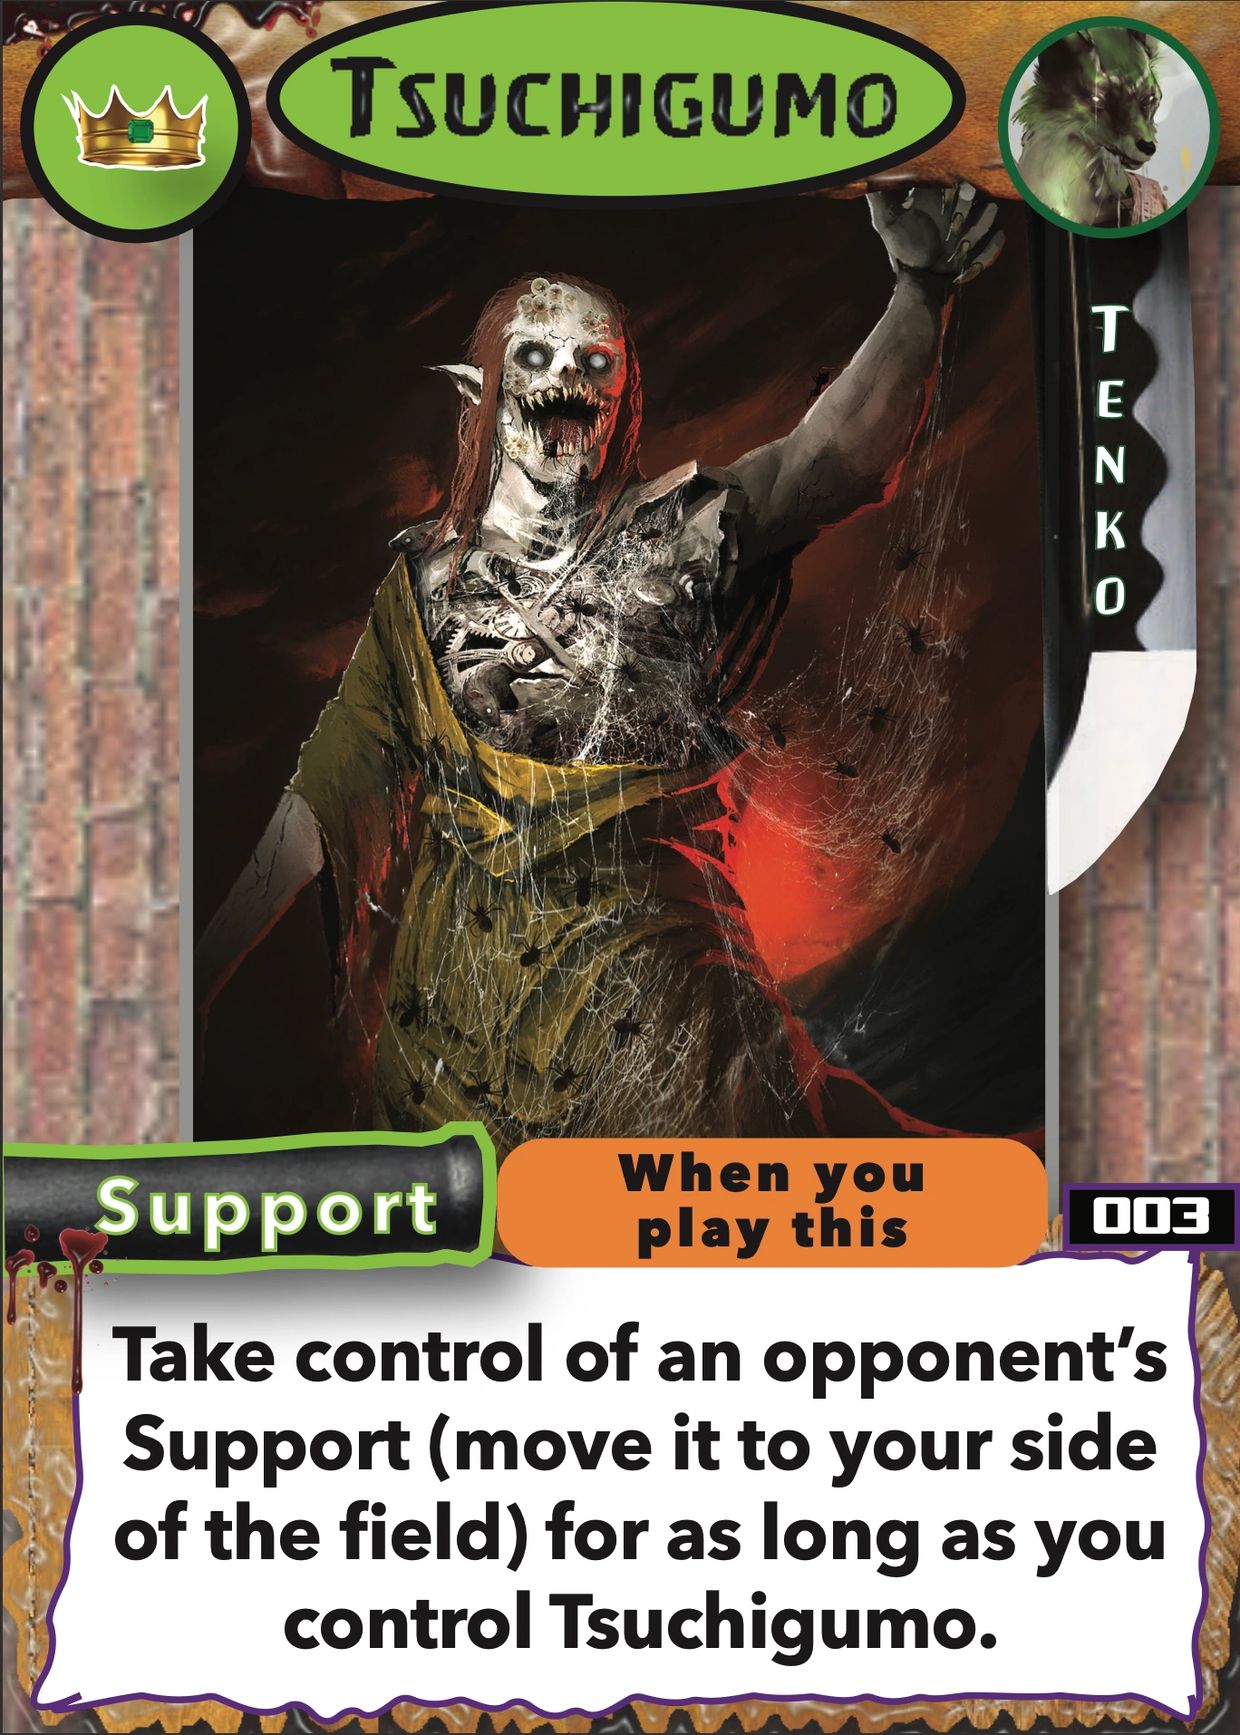
Card Number 003: Tsuchigumo

When you play this Support, target a Support your opponent controls on their side of the field.

Then, move that Support to your side of the field, placing it under your control.


For as long as Tsuschigumo remains on your side of they field, you'll remain in control of that Support (which means that stolen Support will lose 1 Stamina at the start of each of your turns--as will, of course, ALL Supports under your control, inclusing Tsuchigumo.


This Support helps you steal your opponent's so you can feed that stolen Support to Baraka (yet another one of Tenko's Supports).

You can also sacrifice Tschigumo to Baraka, via the latter's effect (resulting in damaging your opponent's hit points).

However, make sure you sacrifice these Supports (to Baraka's effect) in the right order.

If you sack Tsuchigumo first, you'll lose control of the stolen Support, which will then return to your opponent's side of the field and their control.

How Event Cards Work

Spend 1 action to play an Event from your hand.


Do what the card says in the order it's written.


While an Event's effects resolve, that card does not exist anywhere.

It is considered, "in the ether," no longer in your hand, on the field, in a deck or discard pile.


Only after its effects resolve, will a played Event enter its discard pile.

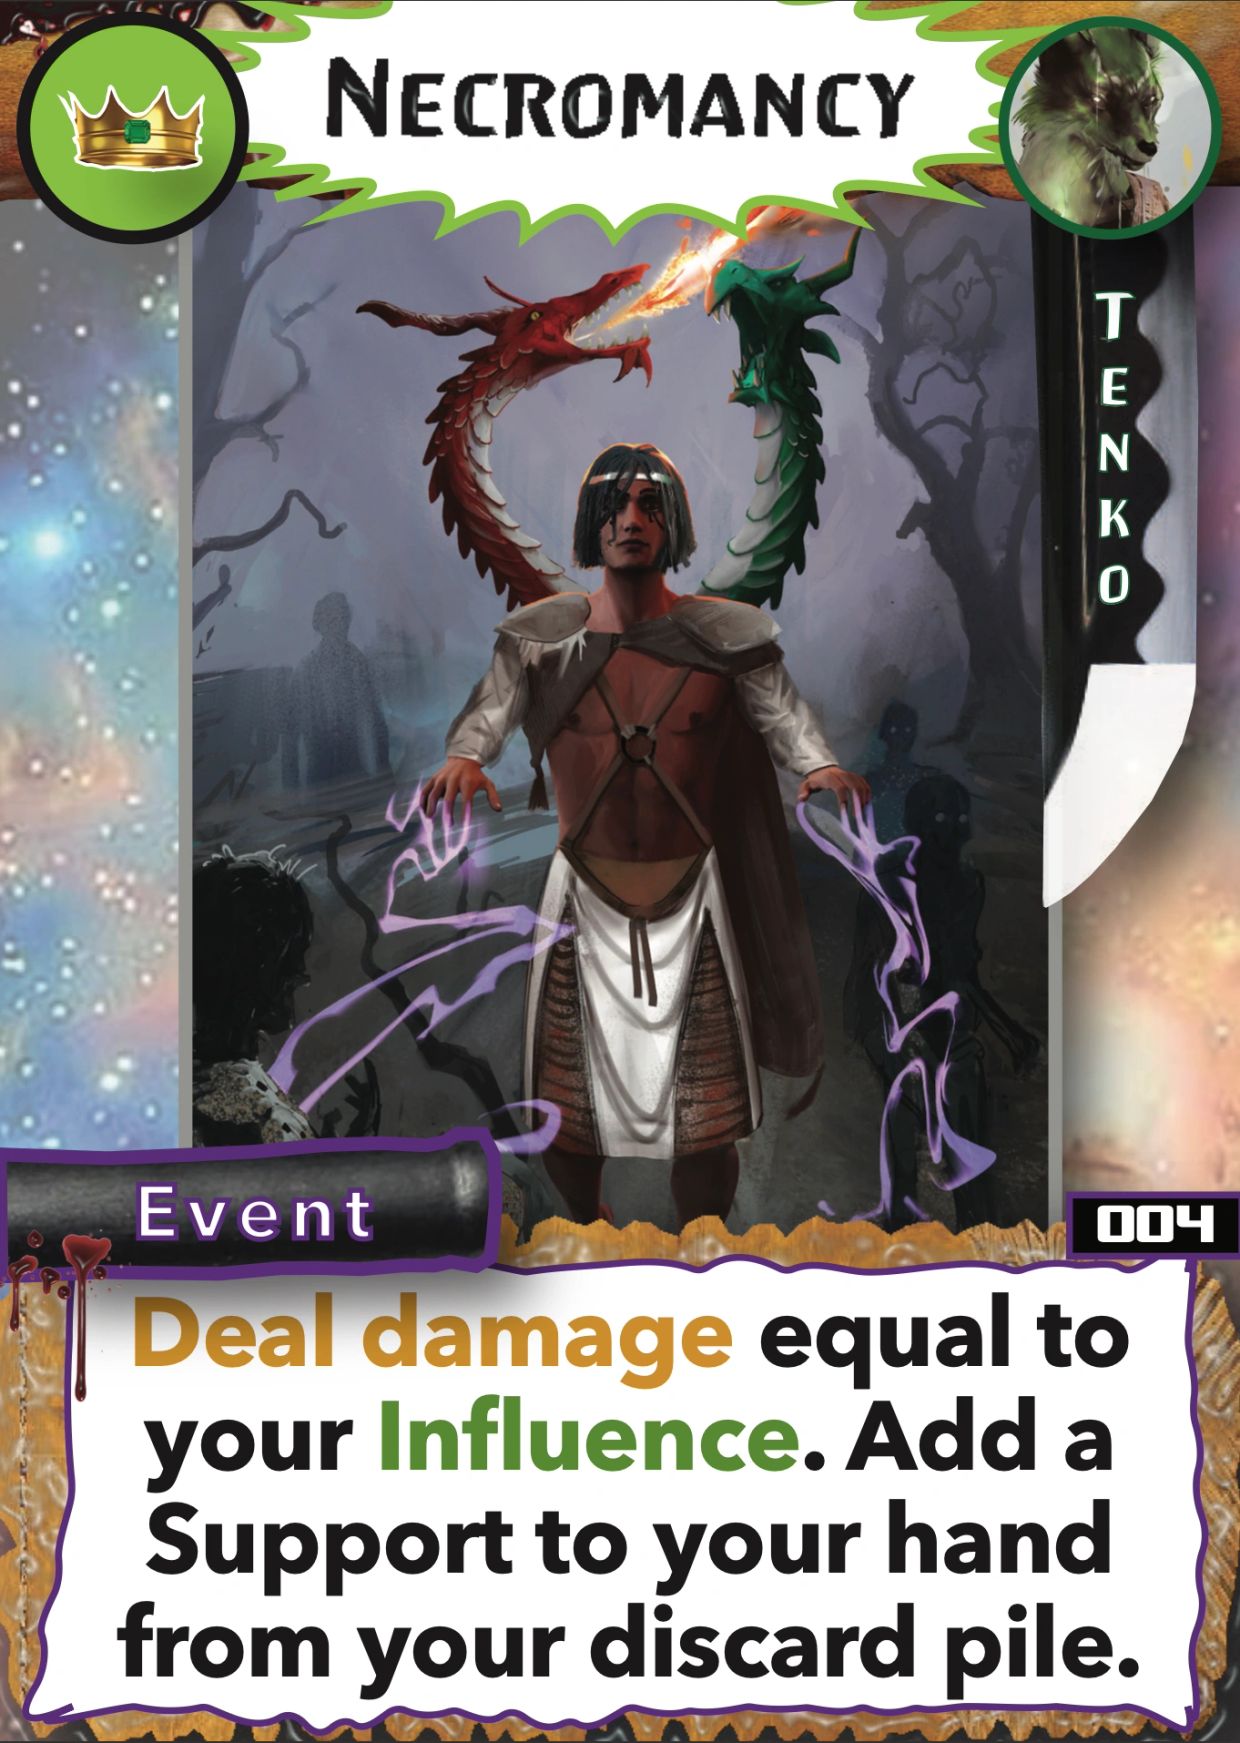
Card Number 004: Chain Creation

When you play this Event:


Deal damage equal to your Influence.


Afterwards, you MAY (there wasn't room to put "may" on there without making a mess of the text box, but it's "may") add a Support from your discard pile to your hand.
How Item Cards Work

Spend 1 action to play an Item from your hand.


To do this, you'll need a number of points in Knowledge equal to or greater than the Item's level.


When you play an Item, place it face-up on your side of the field above your character board.

It's now considered "under Your control" and "in play."


While on your side of the field, Items offer continuous effects to aid you.


Unless an Item  in play says otherwise, you do not need to spend any actions to activate its effect(s).


Like Supports, Items have an orange trigger box that tells you when and how often its effects are triggered or can be activated.

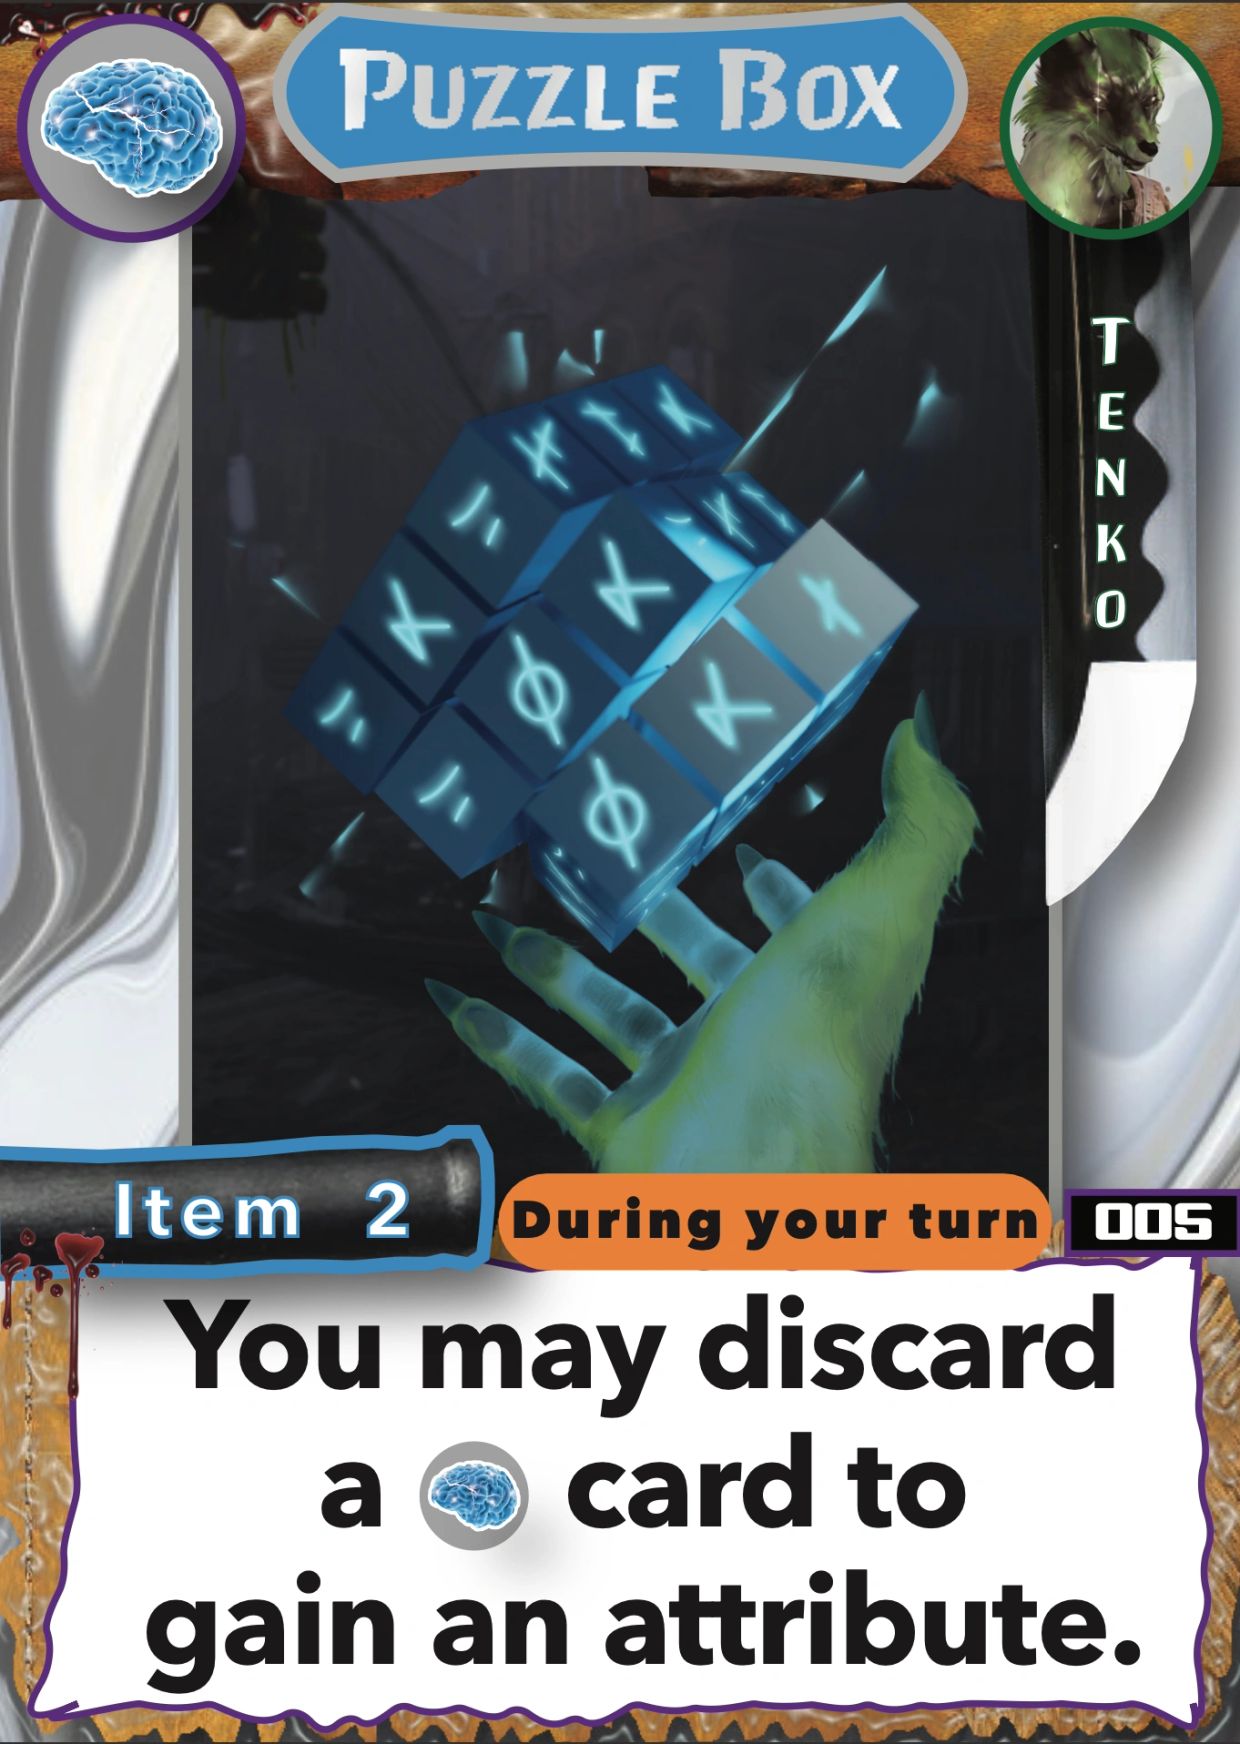
Card Number 005: Puzzle Box

Discarding cards to get a few miles of awesome is what Tenko's Items are all about.


Thanks to her ability, she easily find the right cards to toss away.


While Puzzle Box (a Level 2 Item) is on your side of the field, you can discard a Knowledge card to raise 1 of your attributes by 1 point.

You can do this at ANY time, any number of times.

That means if another player would steal or force you to discard a Knowledge card from your hand, you could respond (so long as you have Puzzle Box on your side of the field) by discarding that Knowledge card to trigger Puzzle Box's effect.

So if you have Puzzle Box on your side of the field, and your opponent's effect would force you to discard a Knowledge card in your hand, you may respond by "feeding" (discarding) the Knowledge card for Puzzle Box's effect BEFORE your opponent's effect would make you discard it (in this exact case, if you had no other cards in your hand, your opponent's discarding effect would fizzle, giving them nothing for the card, ability, and/or actions they spent).


Remember that attributes max at 5 points.

You COULD use this effect to raise another player's attribute, but you'd only want to do that in team play (see "other modes of play").

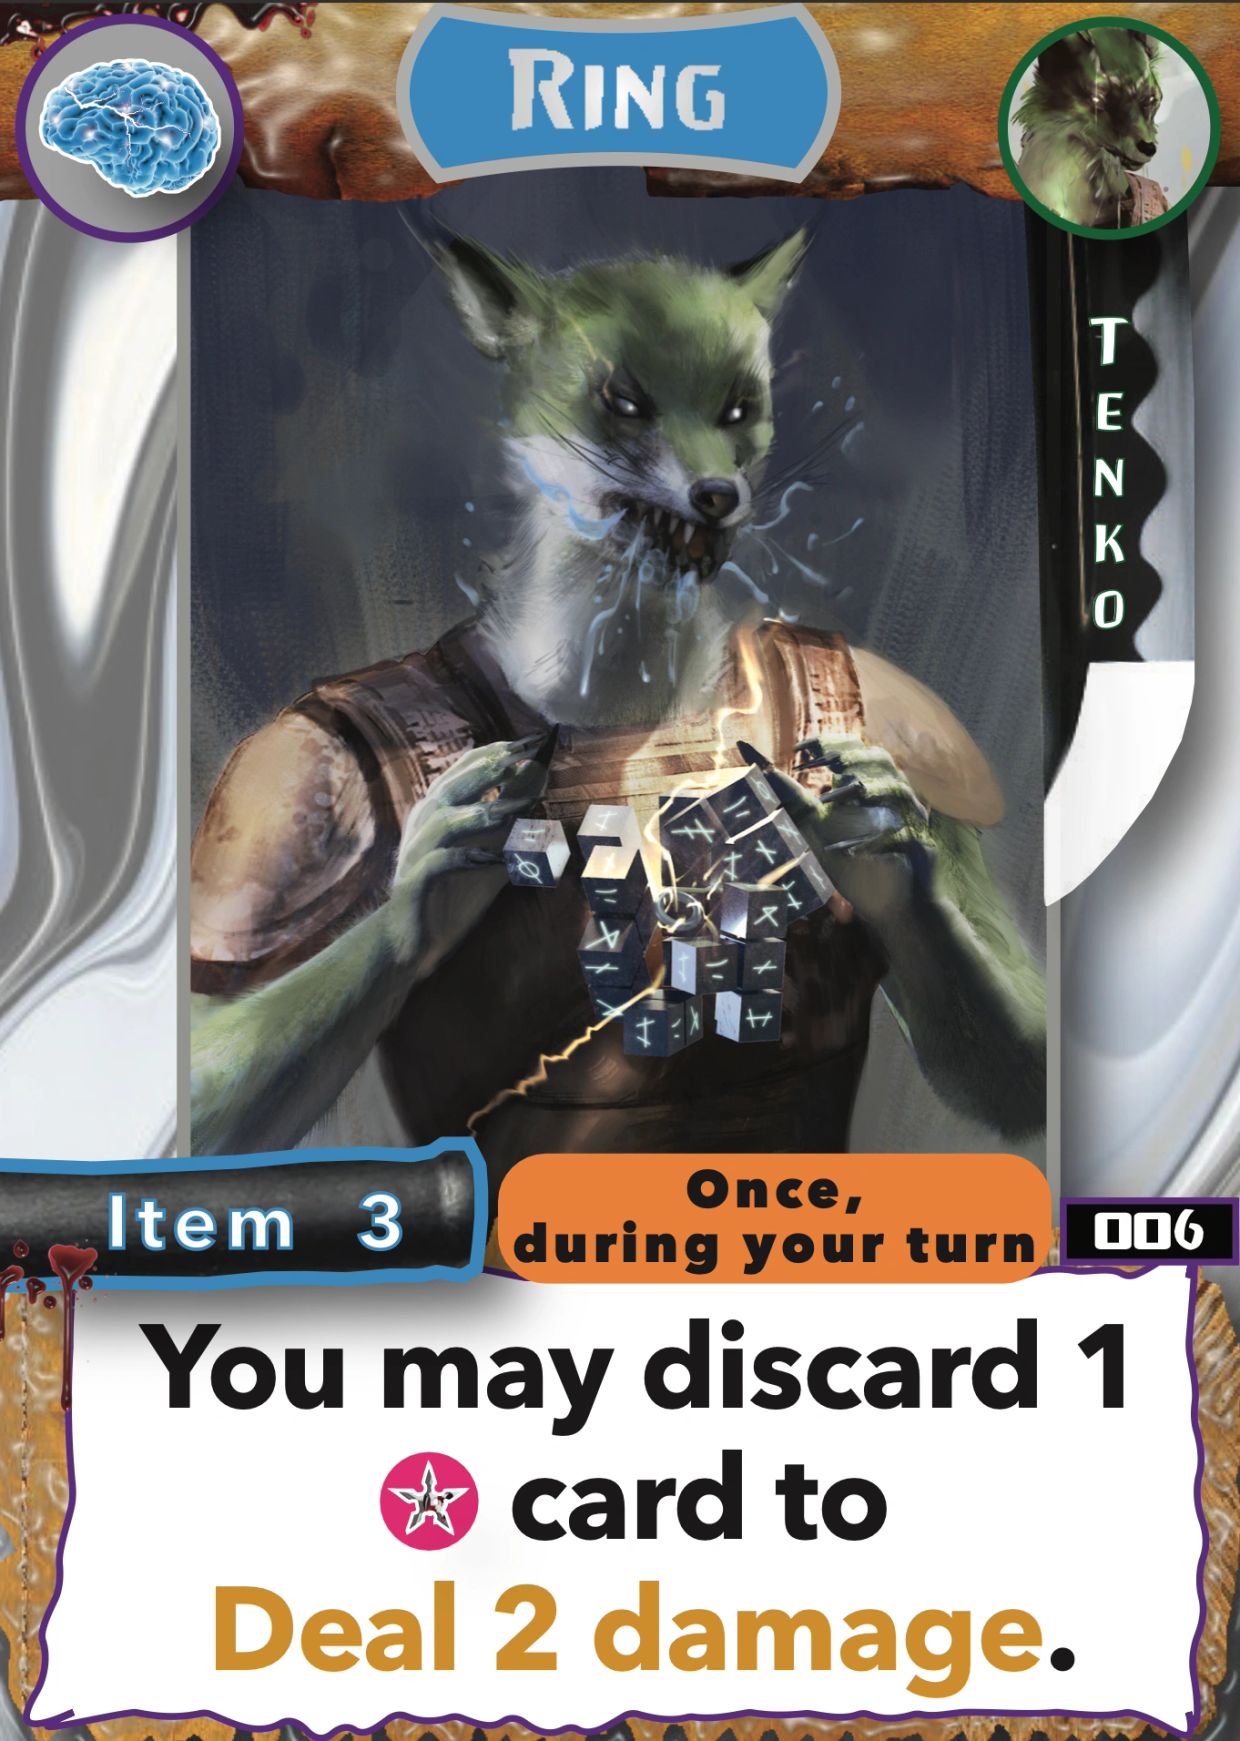
Card Number 006: Ring

While this Item is on your side of the field, you may, once during your turn, discard a Combat card to deal 3 points of damage.

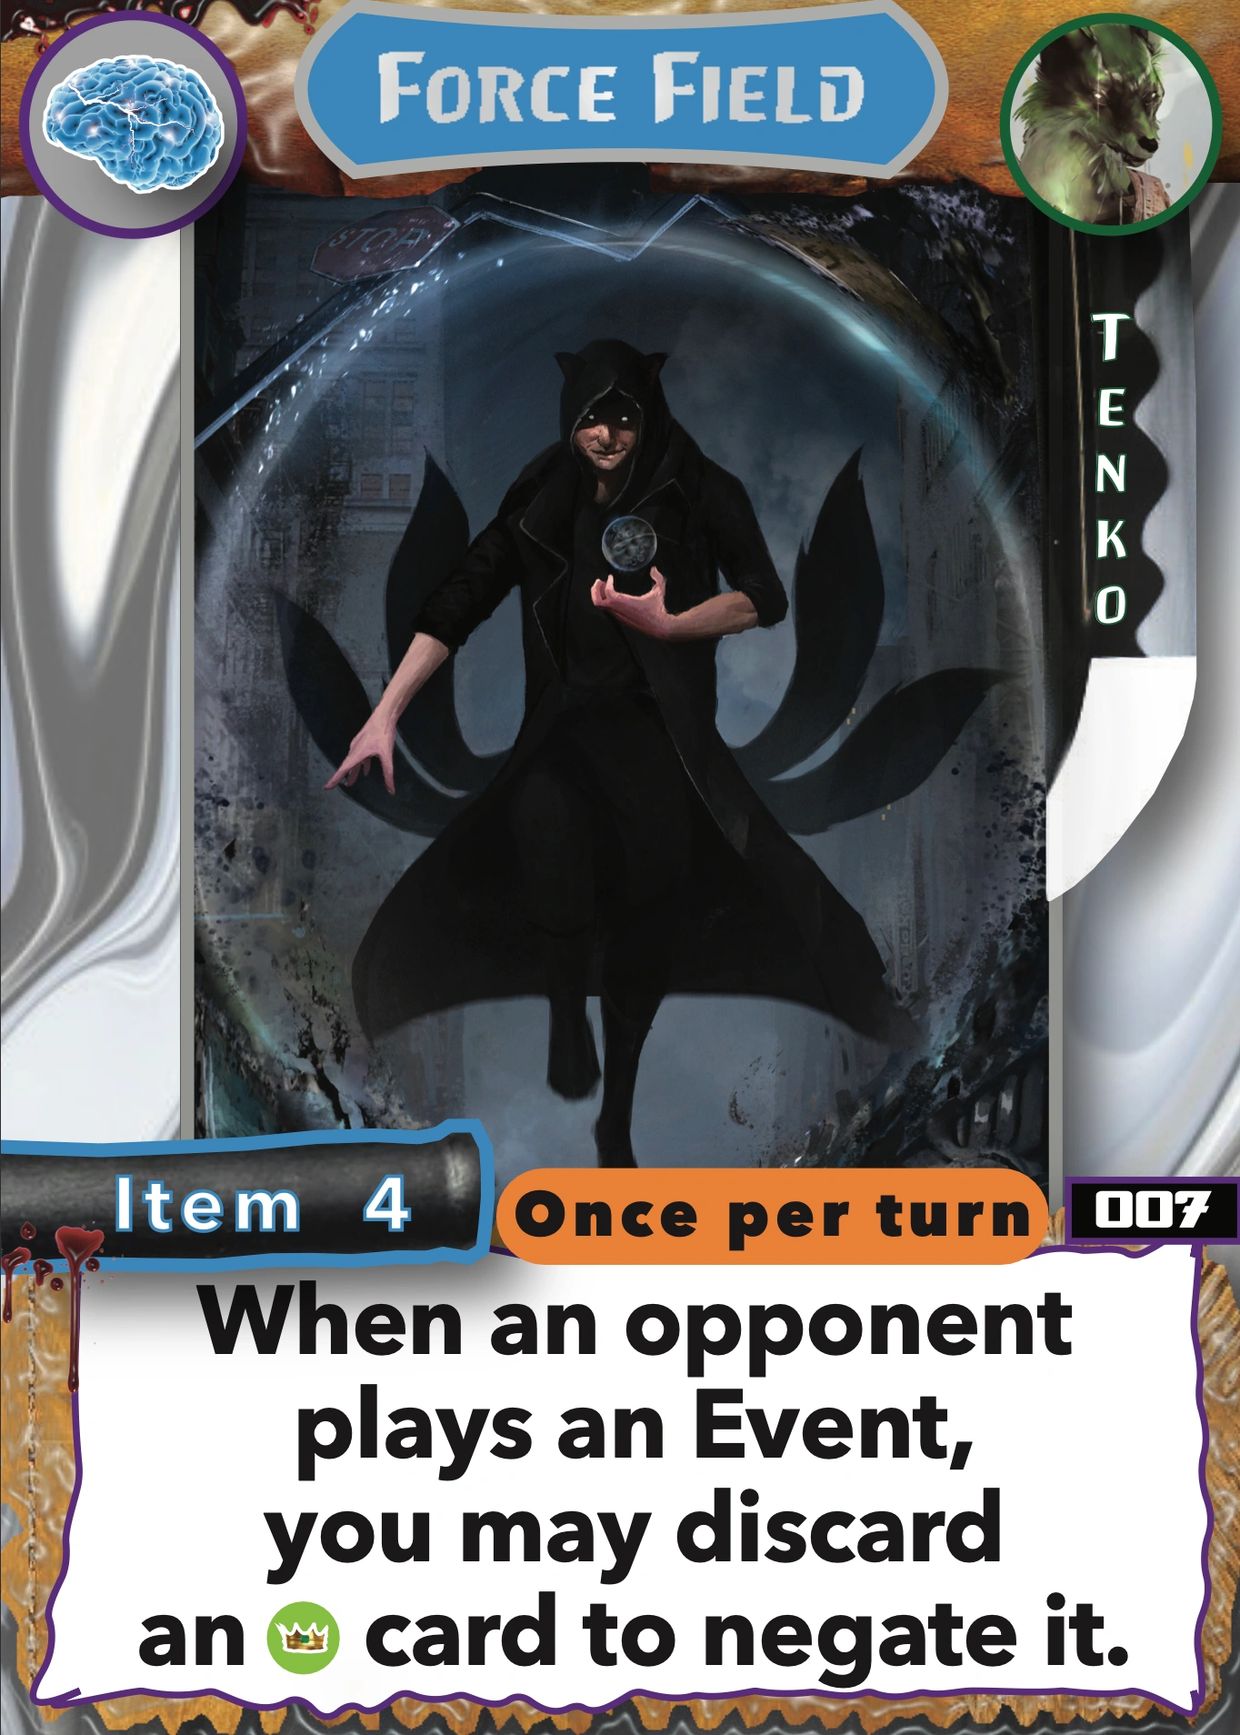
Card Number 007: Force Field

When an opponent plays an Event, and you have Force Field on your side of the field, you may discard an Influence card to negate your opponent's Event.

You may only do this once per turn (all players' turns).


A negated card is technically played, but all its effects are ignored.

The action (and any other cost, if any) spent to play the negated Event is still spent.

Send a negated card straight to its discard pile.
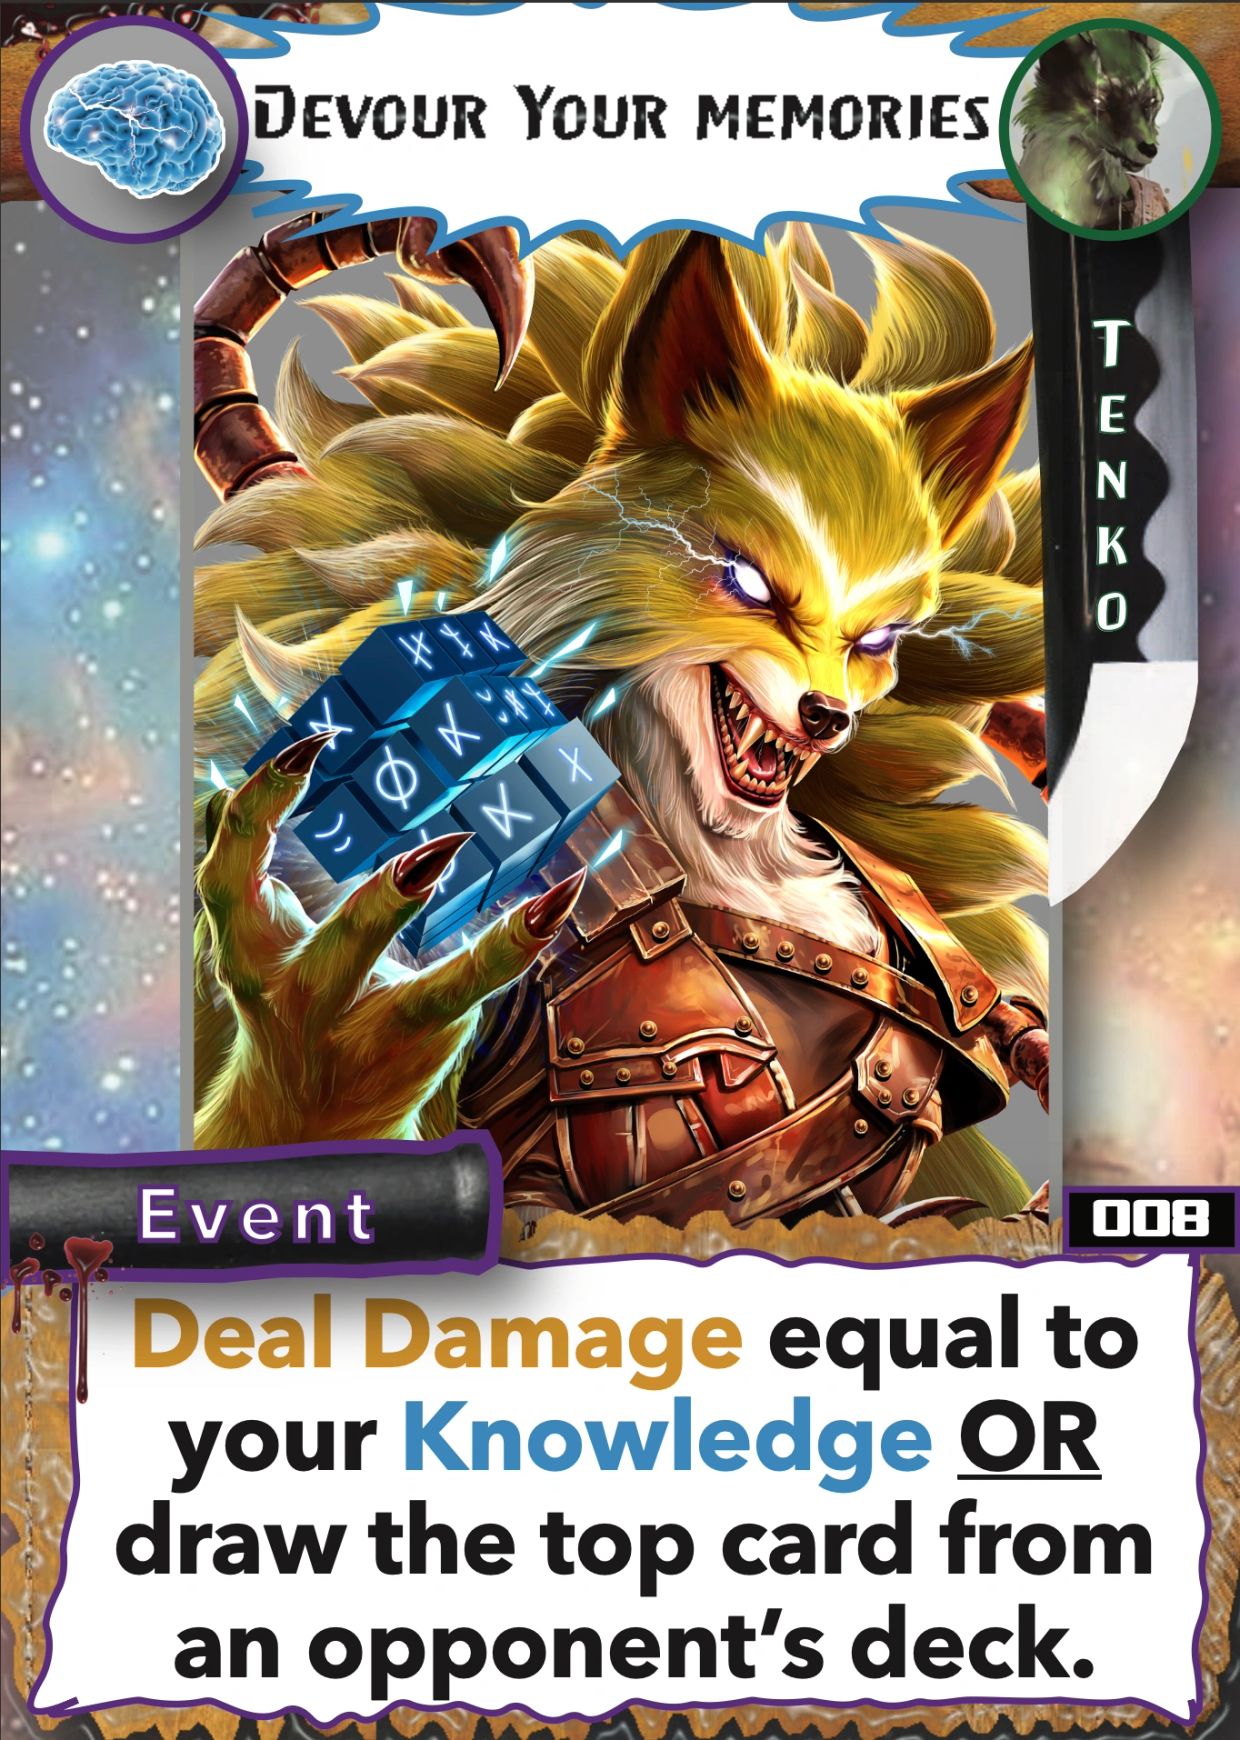
Card Number 008:

(art work and title coming soon)


Options just smell nice.


When you play this Event, you may either:


1) Deal damage equal to your Knowledge, OR . . .


2) Steal 1 random card from 1 opponent's hand.


If Tenko can get some use out of the card she swipes (and given her Items, she should), she's going to quickly outpace her opponents by stealing and turning their cards against them.

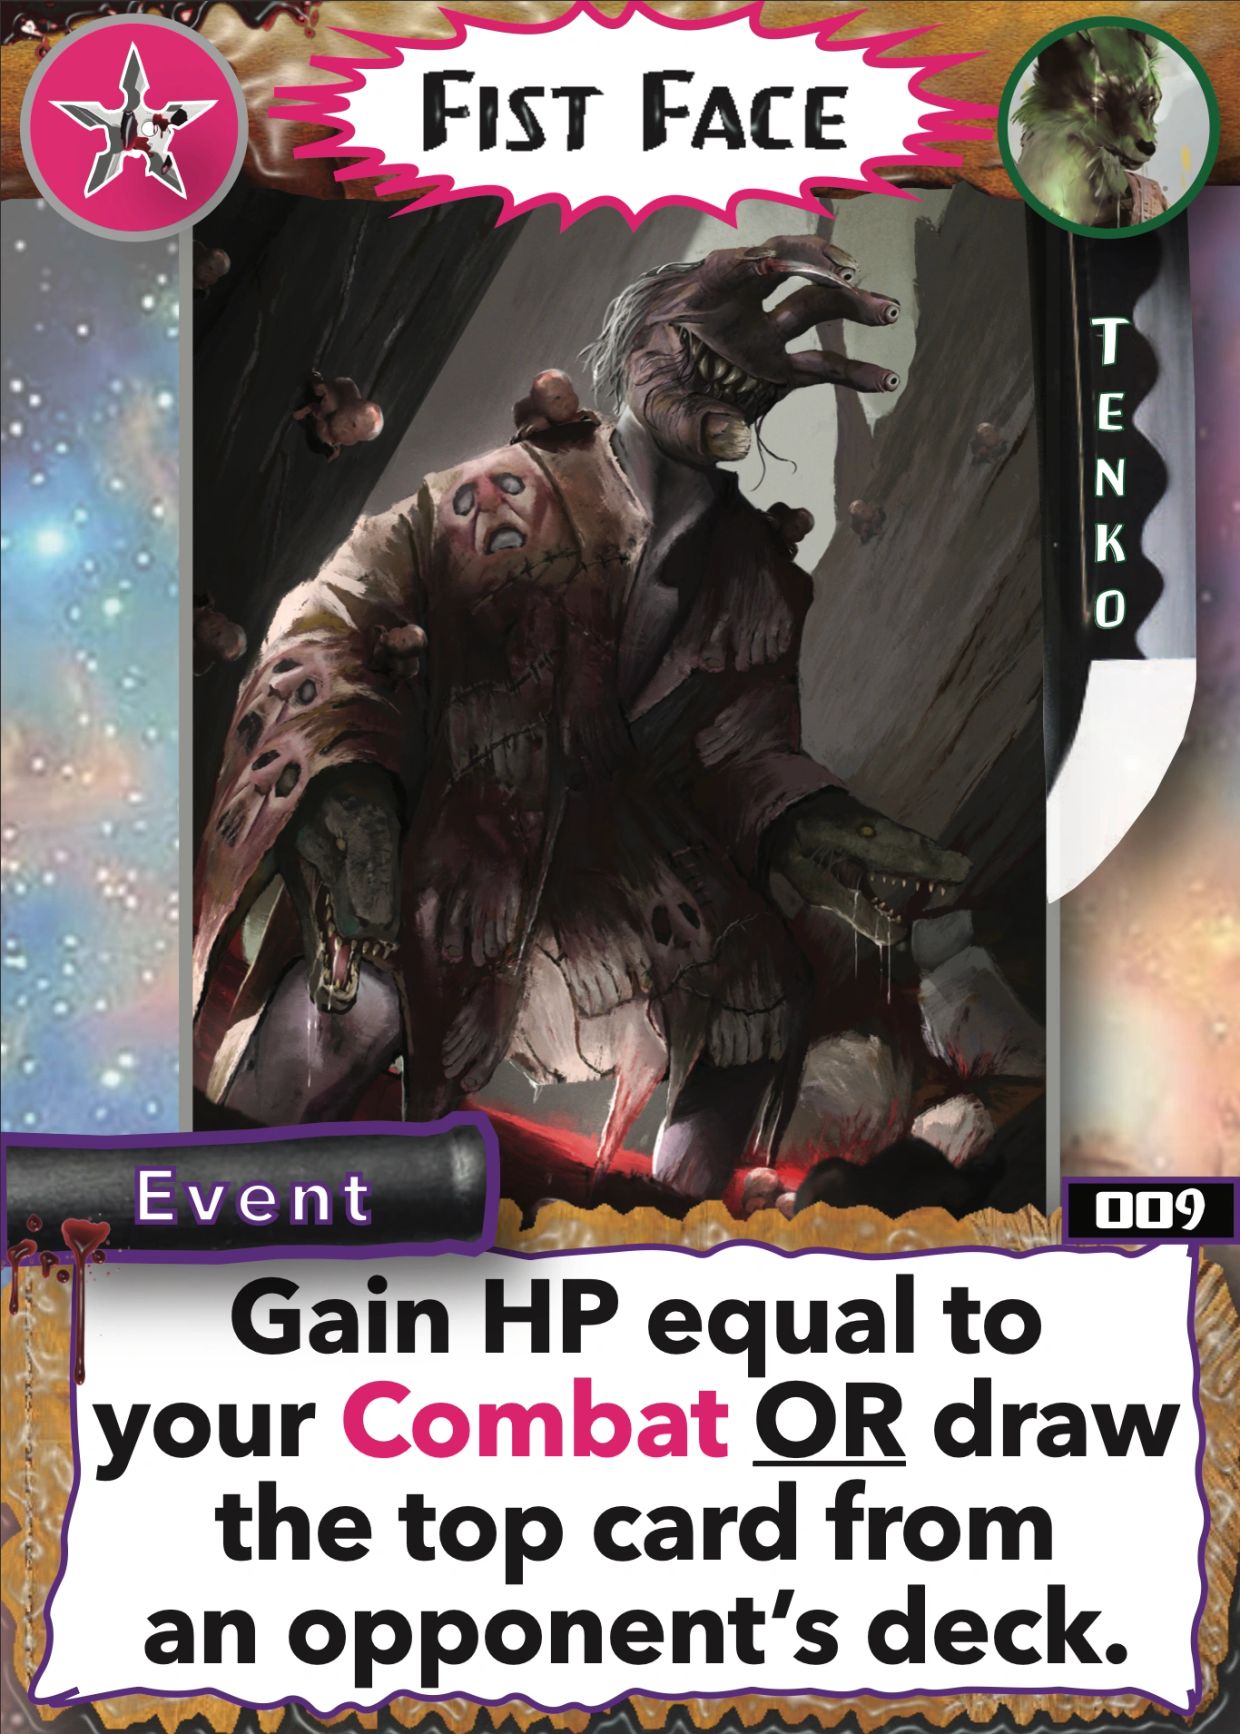
Card Number 009: Fist Face

When you play this Event, you may either:


1) Gain hit points equal to (or fewer than) your Combat (remember: your hit points max at 20), OR . . .


2) Steal a random card from your opponent's hand.

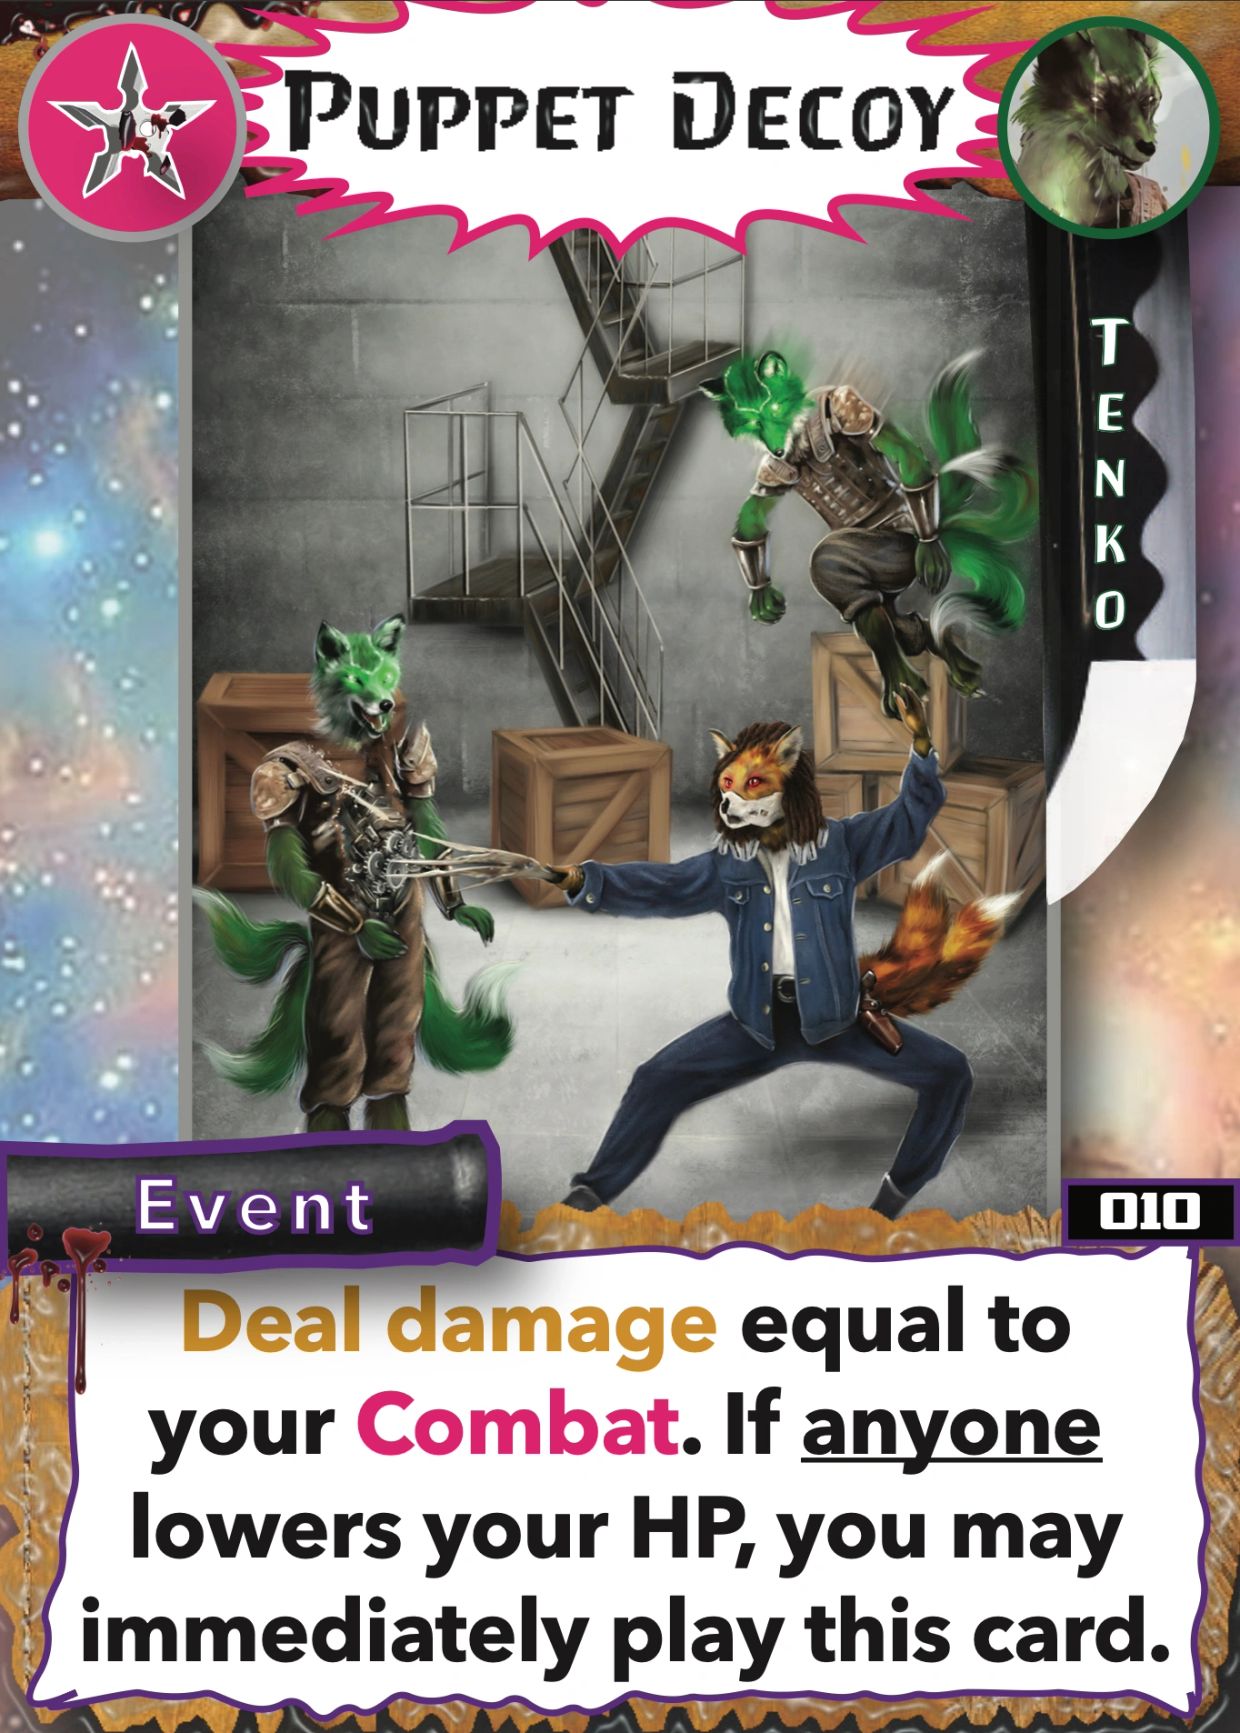
Card Number 010: Puppet Decoy

When you play this card, you'll deal damage equal to your Combat.


No big deal there, right?


Except you may play this card, without spending an action, at ANY point during the game, so long as you do so immediately after losing hit points for ANY reason.

You don't have to target the same player who lowered your hit points.


The ability to play this for free after taking damage is optional.

Just because Puppet Decoy is in your hand, doesn't mean you have to use it.


This can give Tenko a nice tempo boost.


Also, if the damage Tenko takes lowers her hit points to zero, she cannot respond by playing this card . . . because she already lost.
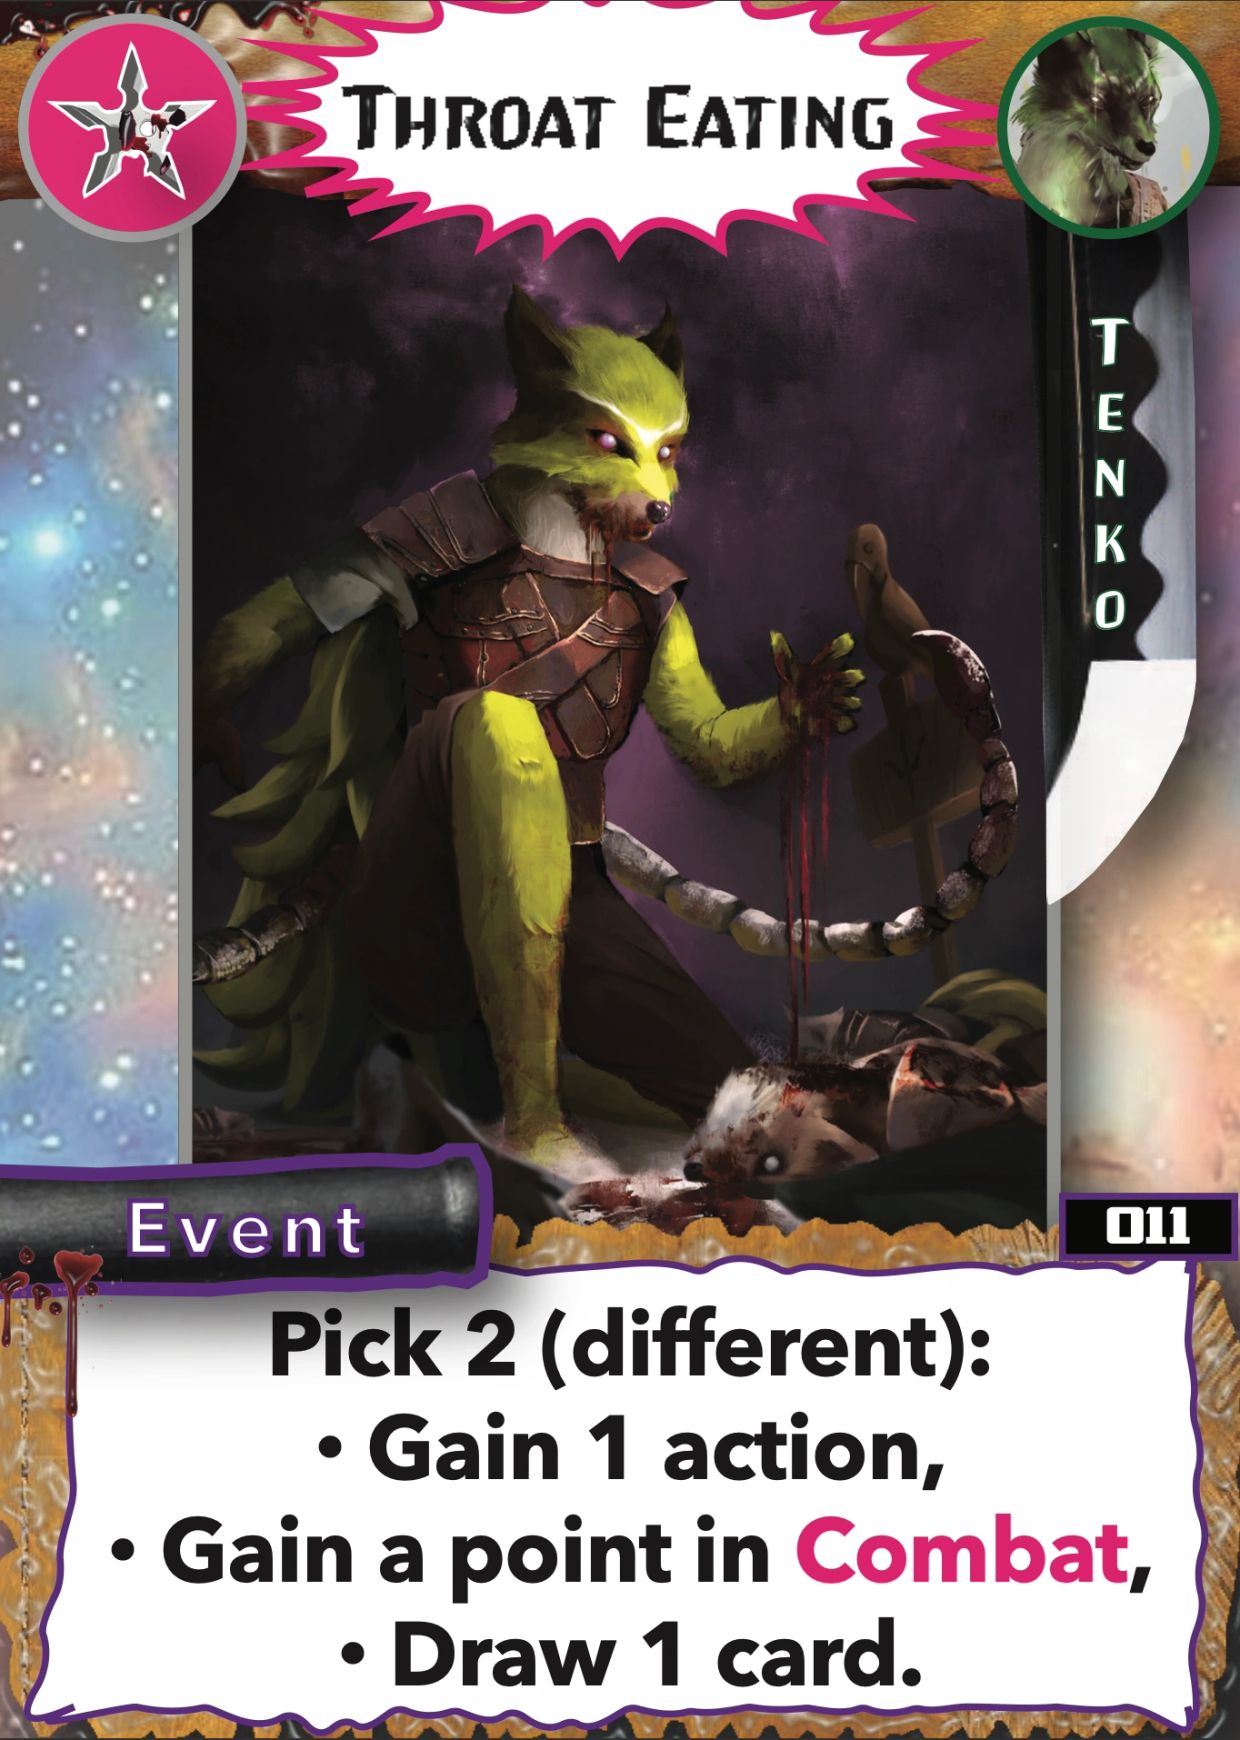
Card Number 011: Throat Eating

When you play this Event, you'll gain a point in Combat (or not, if you're already maxed out in Combat).


Then, you'll gain an action.


Basically, this card pays for itself, refunding the action you spend to play it.

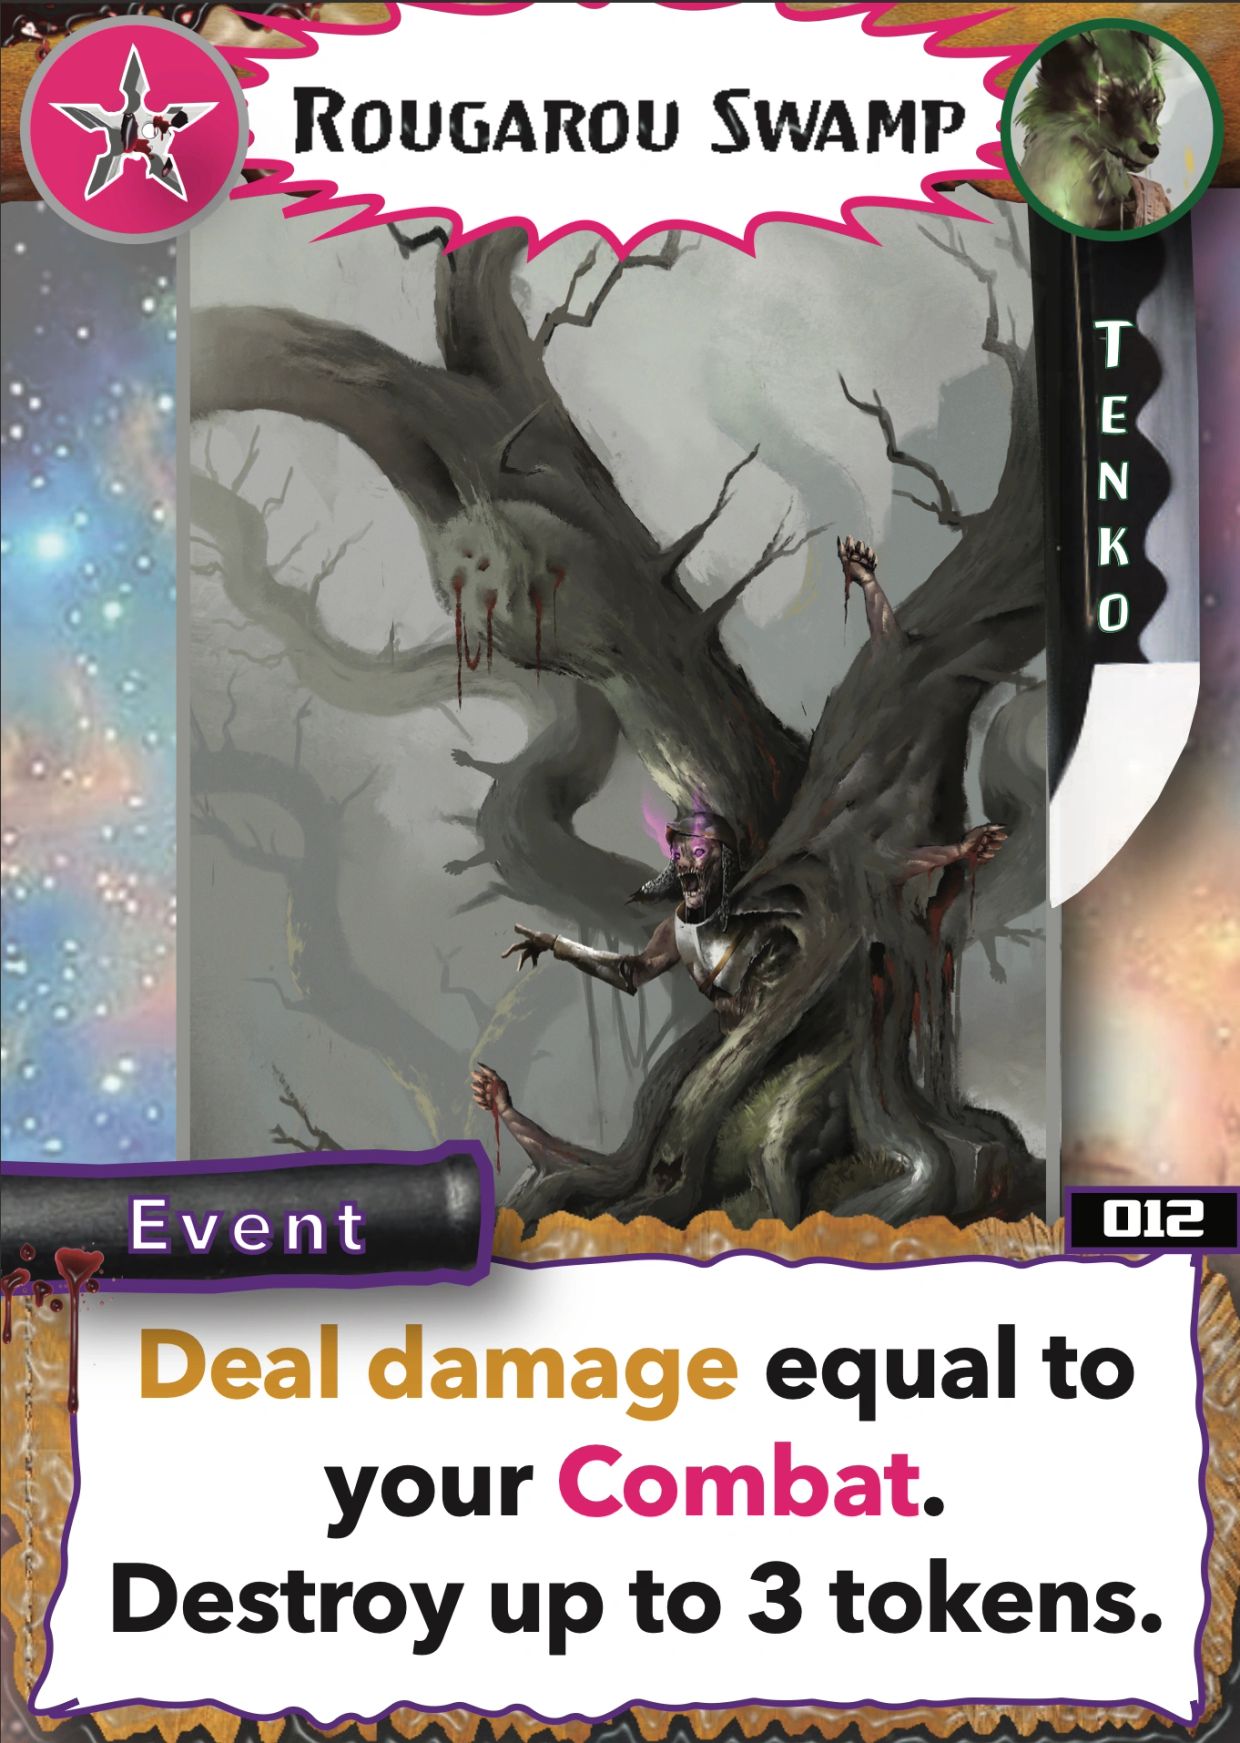
Card Number 012: Rougarou Swamp

When you play this Event, deal damage equal to your Combat.


Afterwards, you may destroy up to 3 tokens.

Remember that you can mix and match which types of tokens you destroy.


This 3 token limit is nice if you have low Combat, but not so nice as you gain more.

The reason behind this limitation is that Tenko's kit already includes Tsuchigumo, which deals powerful blows against her opponent's Supports (and Supports, or their Stamina at least, serves as most common token type in Duelists).


Copyright © 2015 Darkwana Games - All Rights Reserved.

Powered by

This website uses cookies.

We use cookies to analyze website traffic and optimize your website experience. By accepting our use of cookies, your data will be aggregated with all other user data.

DeclineAccept